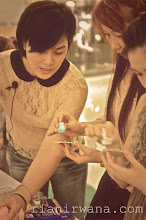
Scrapgathering - photo transfer


- Take a black and white photocopies or color laser copies of the photos that you want to work with. Please note, that ink-jet prints copies could not be used for this method because we'll use water later.It will run out.
- You can use clear packing tape for small photos, or laminating clear sticker that we usually use at Scrapking to laminate photos, or contact paper ( you may find it at any leading book store) if you have larger size of photo.
- Peel the protective backing of the laminate sheet and carefully press the sticky side of the sticker to the copied images of your photo.
- Burnish the surface with bone folder or other burnishing tools. Give it a really good rub to make sure it stick together well.
- Soak the whole piece in a bowl of water for several minutes.
- Gently rub off the back of the paper with your fingertips. (Alice said don't do this kind of method just after you done your manicure or you'll regret it! LOL)
- Your image will remain in the sticky surface and appear completely transparent!
- Lay your transferred image on top of another surface to allow the background to show through.(If you look at the photo at my layout here, I used little polka dots pink pattern paper for my background) If the sticker isn't sticky enough, you can use gel medium to put the image down.
We all fall in love with this method and think to share it with you in the class for next month. So don't miss it! Thank you, girls!


